Ignition Integration
How to connect EG500 Gateway to Ignition via Sparkplug B
Introduction
Ignition is an industrial automation platform used to monitor, control, and analyze industrial processes in real time. It combines SCADA, HMI (Human-Machine Interface), and IIoT (Industrial Internet of Things) capabilities into one unified software solution. The Elastel Gateway EG500 is an open, high-performance, and user-friendly industrial embedded computer. With the prebuilt IIoT Gateway software ElastPro, it facilitates seamless integration with Ignition SCADA systems through the Sparkplug B protocol.
This tutorial will walk you through the configuration steps for the Elastel EG500 to collect data from Modbus TCP and post it to the Ignition platform via Sparkplug B.
Prerequisites
Before you begin, ensure you have:
- An Elastel EG500 gateway
- A PC running Ignition software
1. Ignition Configuration
1.1 Download and Install MQTT Modules
- Go to the Ignition official website and download the following modules:
MQTT-Distributor-signed.modlMQTT-Engine-signed.modl
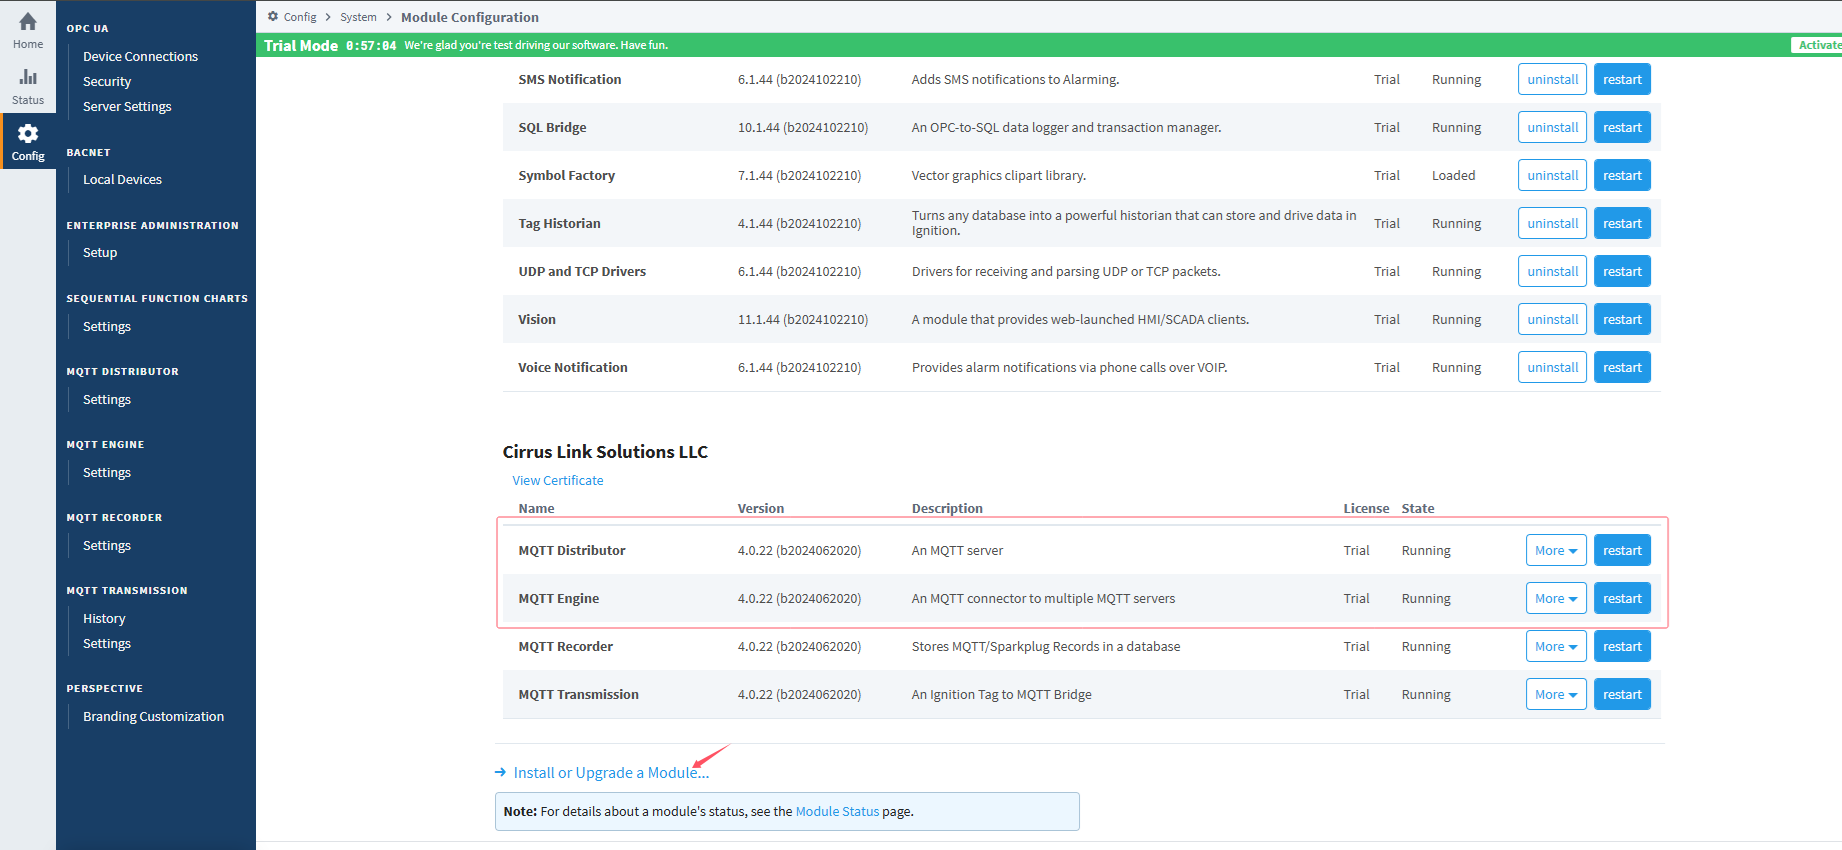
- In Ignition Web Interface, navigate to Config → SYSTEM → Modules.
- Click Install or Upgrade a Module... and upload both
.modlfiles.
1.2 Configure MQTT-Distributor
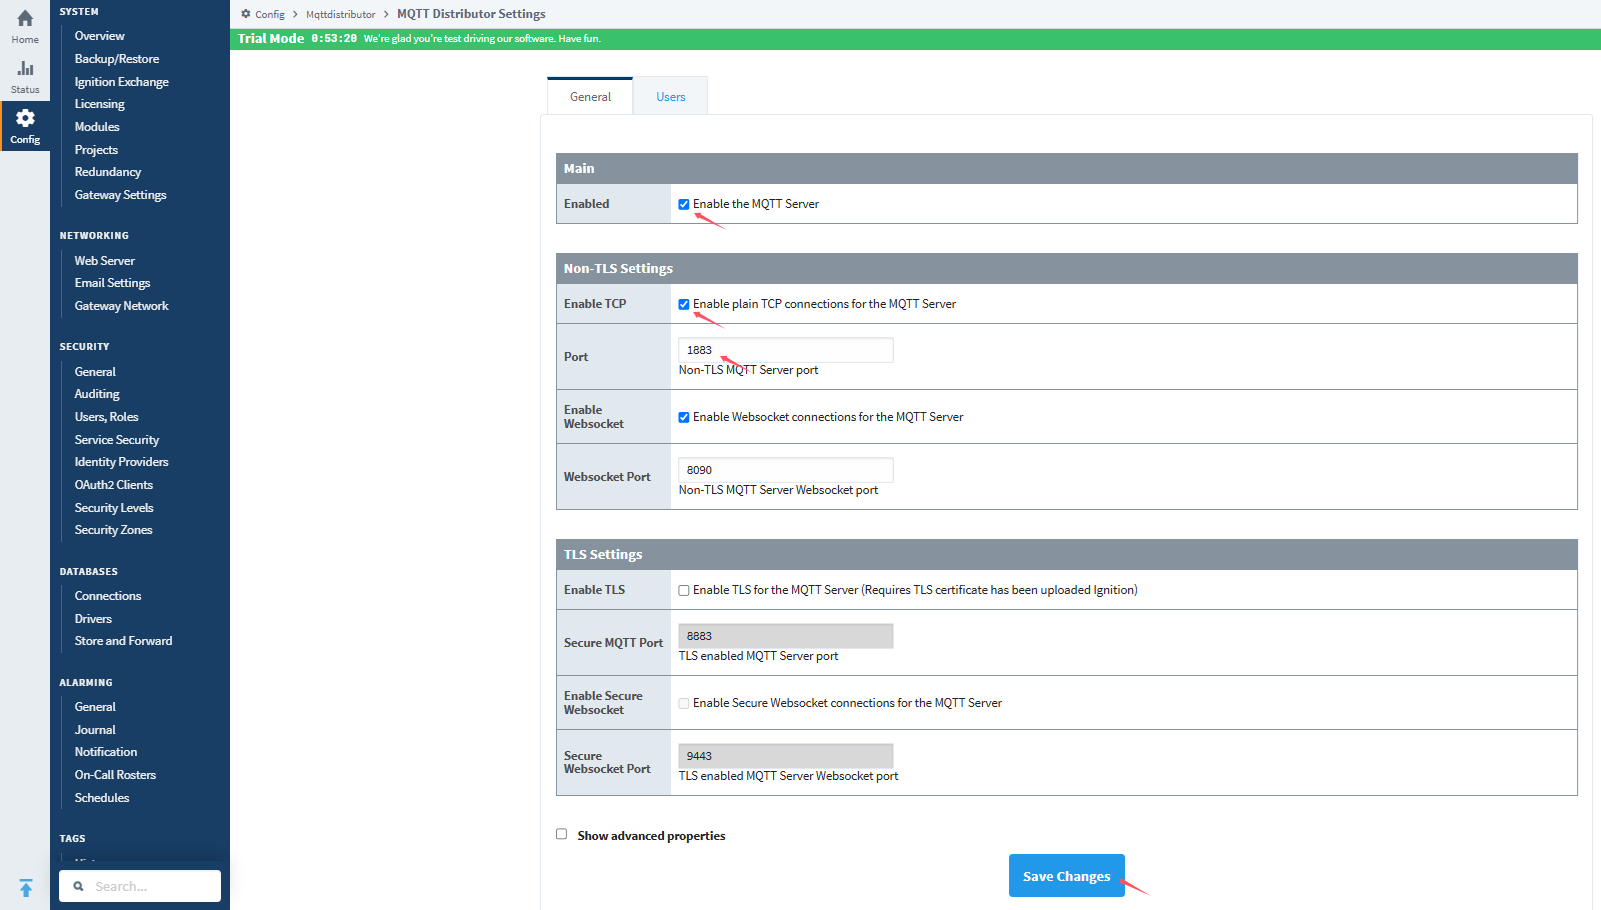
- In Ignition Web Interface, go to Config → MQTT DISTRIBUTOR → Settings → General.
- Enable MQTT Server service.
- Set the desired parameters (port, TLS, etc.) and click Save Changes.
- Under Users, add usernames and passwords for MQTT clients.
For detailed steps, see the MQTT Distributor documentation.
1.3 Configure MQTT-Engine
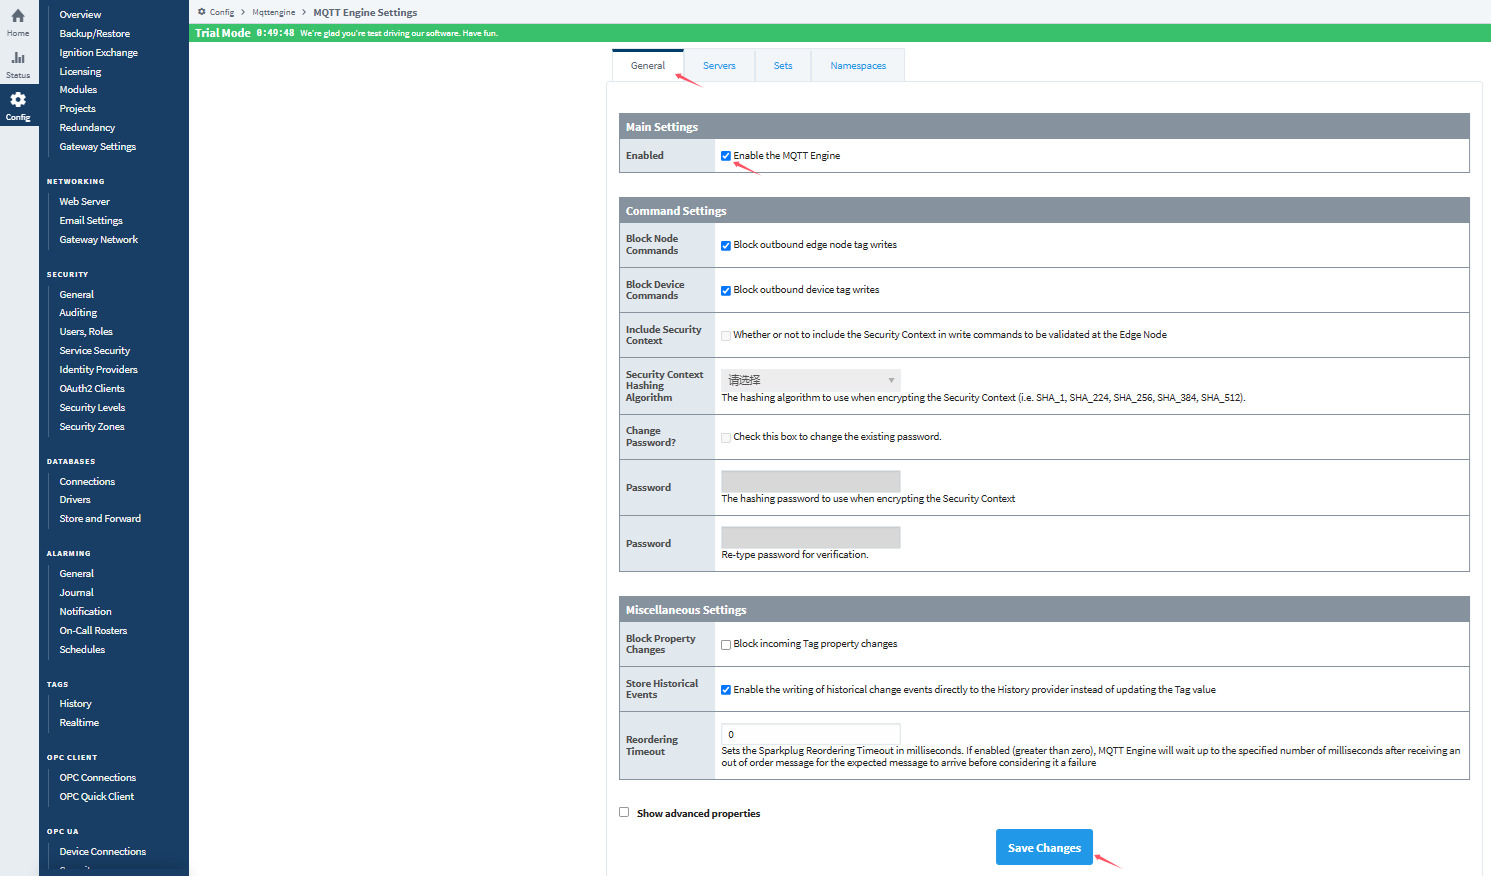
- In Ignition Web Interface, go to Config → MQTT ENGINE → Settings → General.
- Enable MQTT Engine service.
- Configure connection settings to the Distributor and click Save Changes.
For detailed steps, see the MQTT Engine documentation.
2. Elastel Gateway Configuration
In this section, you will configure the EG500 to collect Modbus TCP data and publish it to Ignition via Sparkplug B.
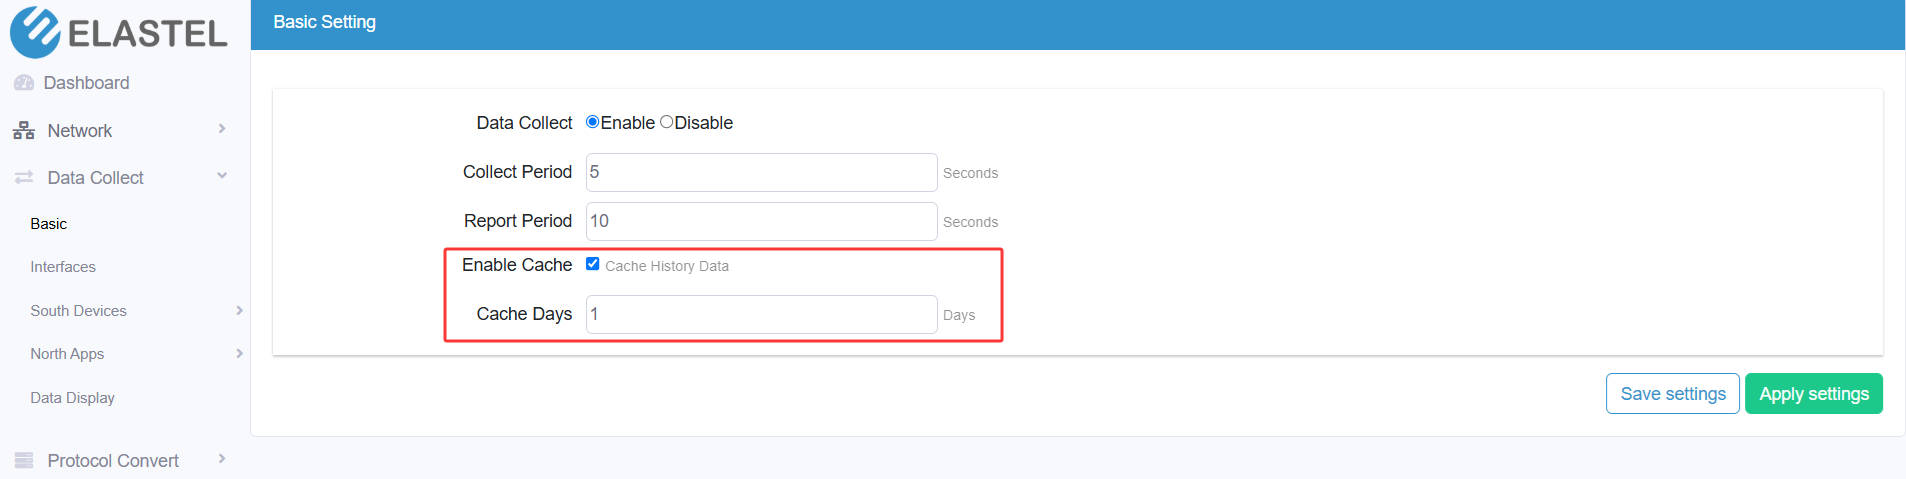
2.1 Enable Data Collection
- Log in to the EG500 WebUI.
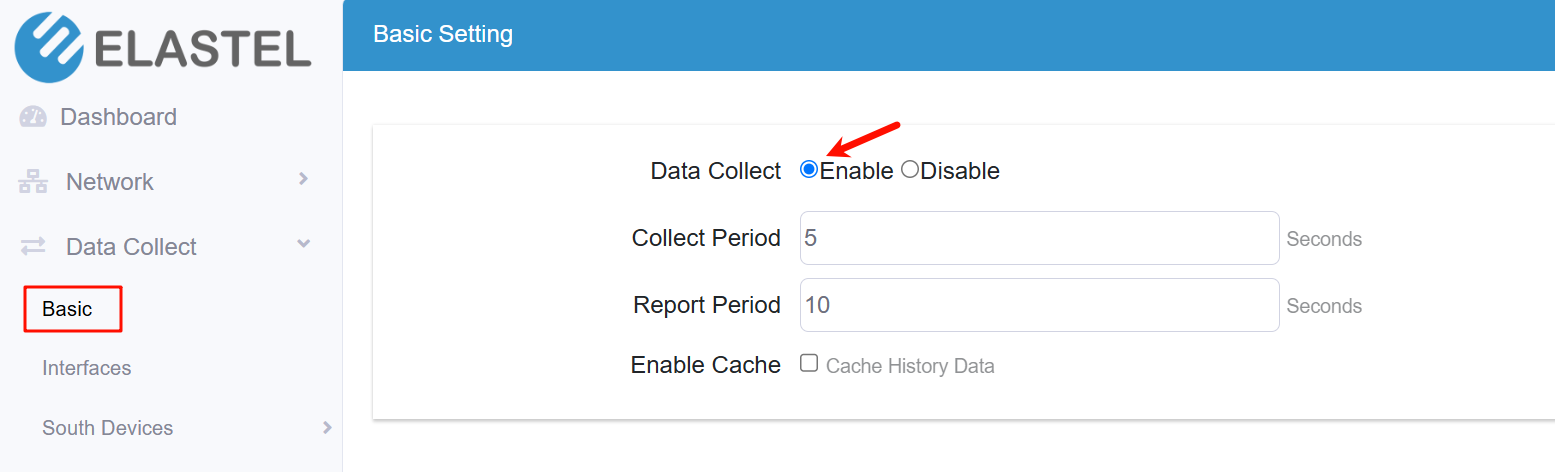
- Navigate to Data Collect → Basic.
- Enable Data Collect, configure the data collect and report period settings, and click Apply Settings.
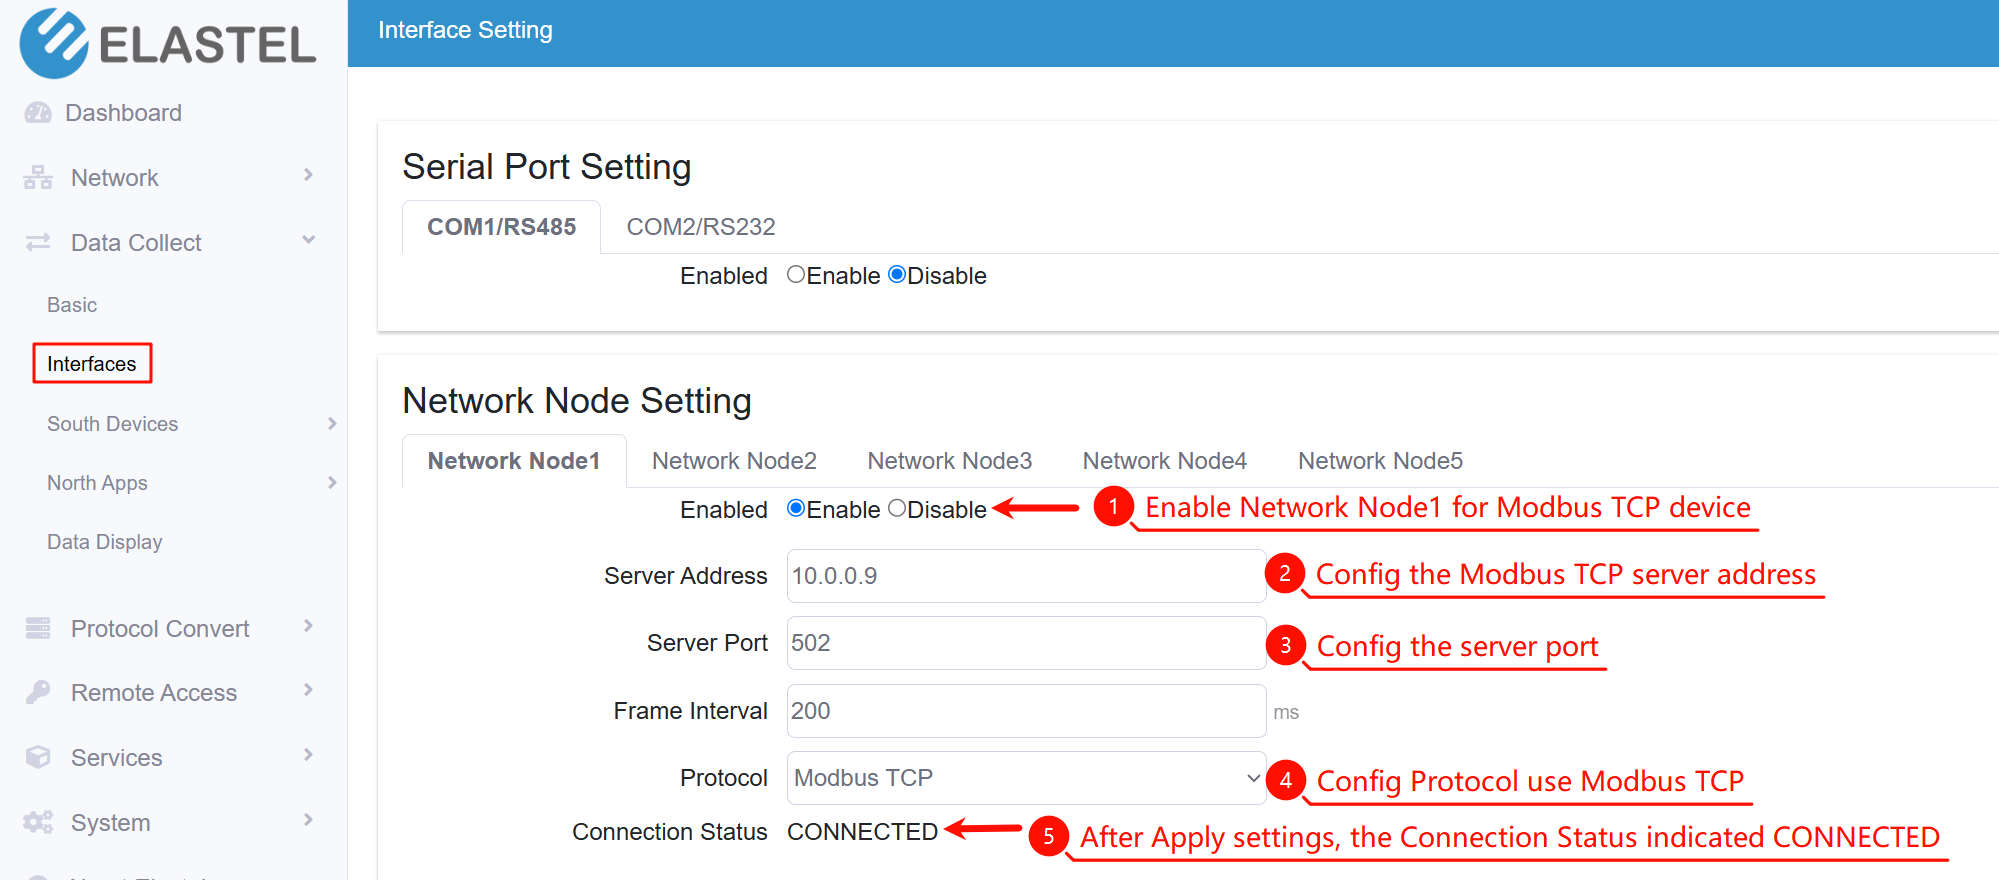
2.2 Configure Modbus TCP Interface
- Go to Data Collect → Interfaces.
- Enable Network Node1 (or another node), set IP, port, and other parameters, then click Apply Settings.
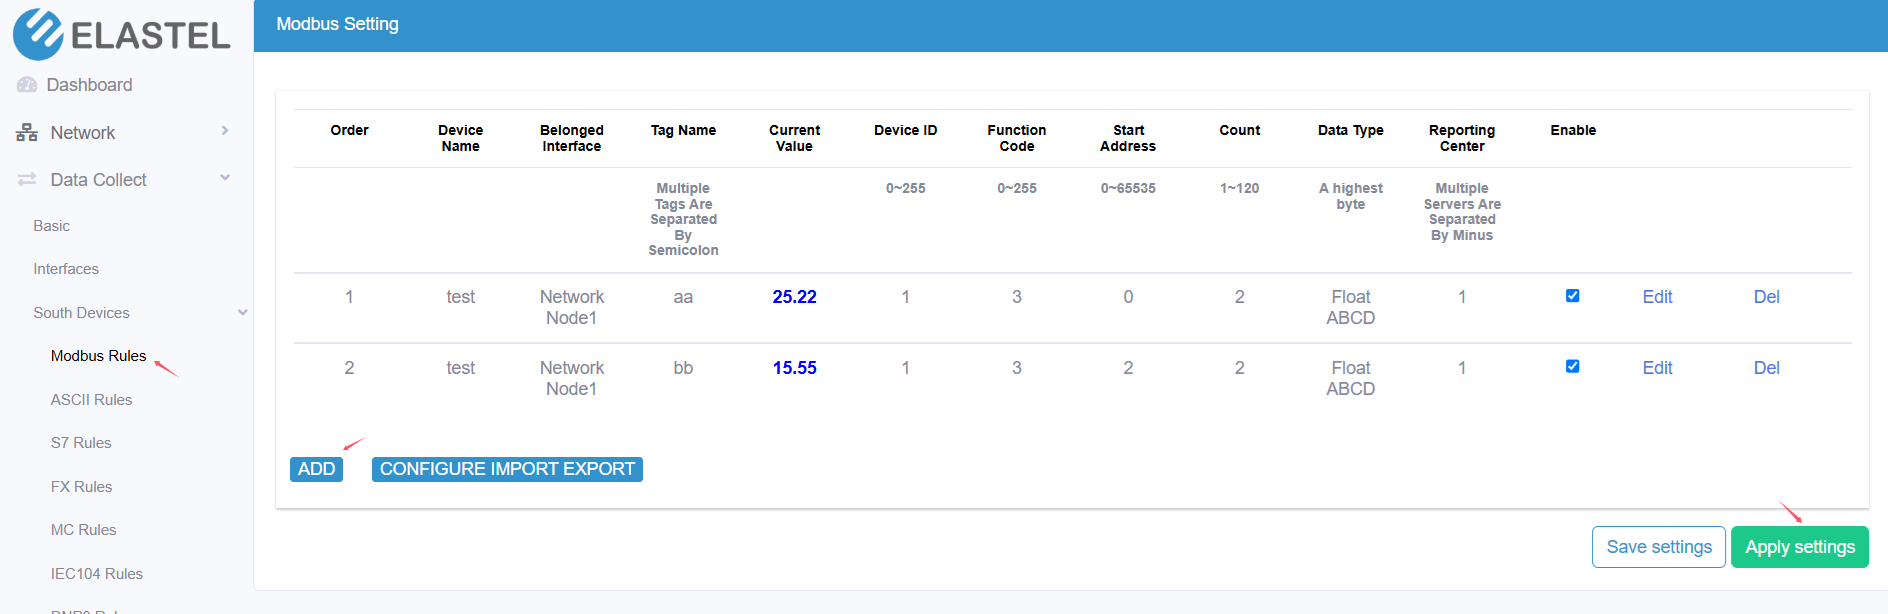
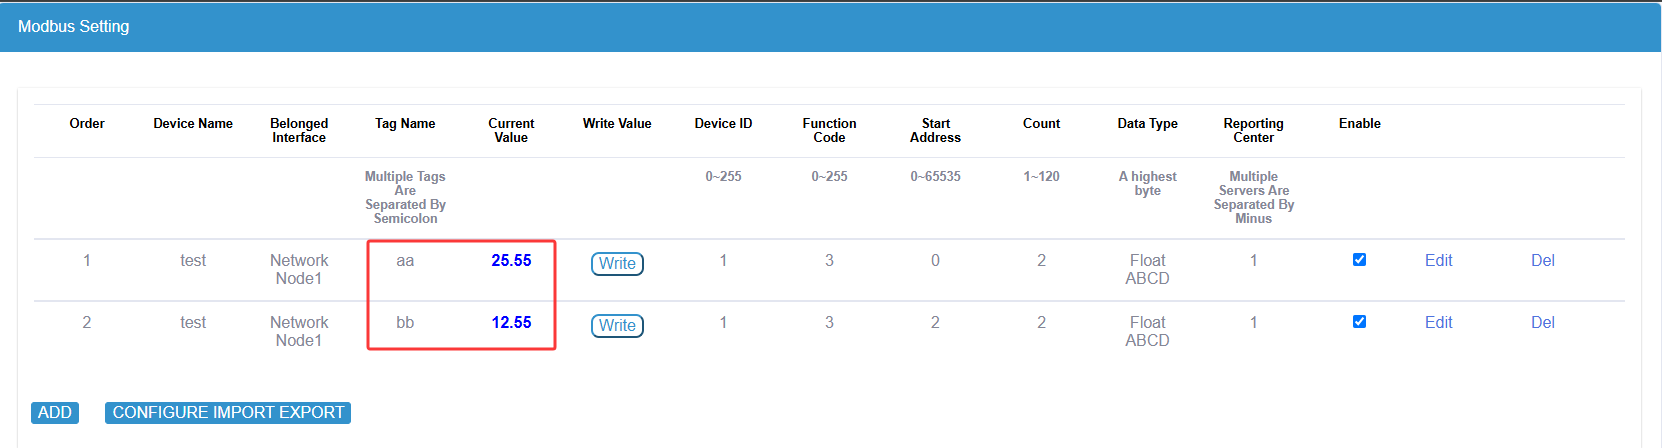
2.3 Create Modbus Rules
- Go to Data Collect → Modbus Rules.
- Click ADD to create a new rule.
- Configure the rule (Device ID, Tag name, register addresses, data types, etc.).
- Click Apply Settings to save.
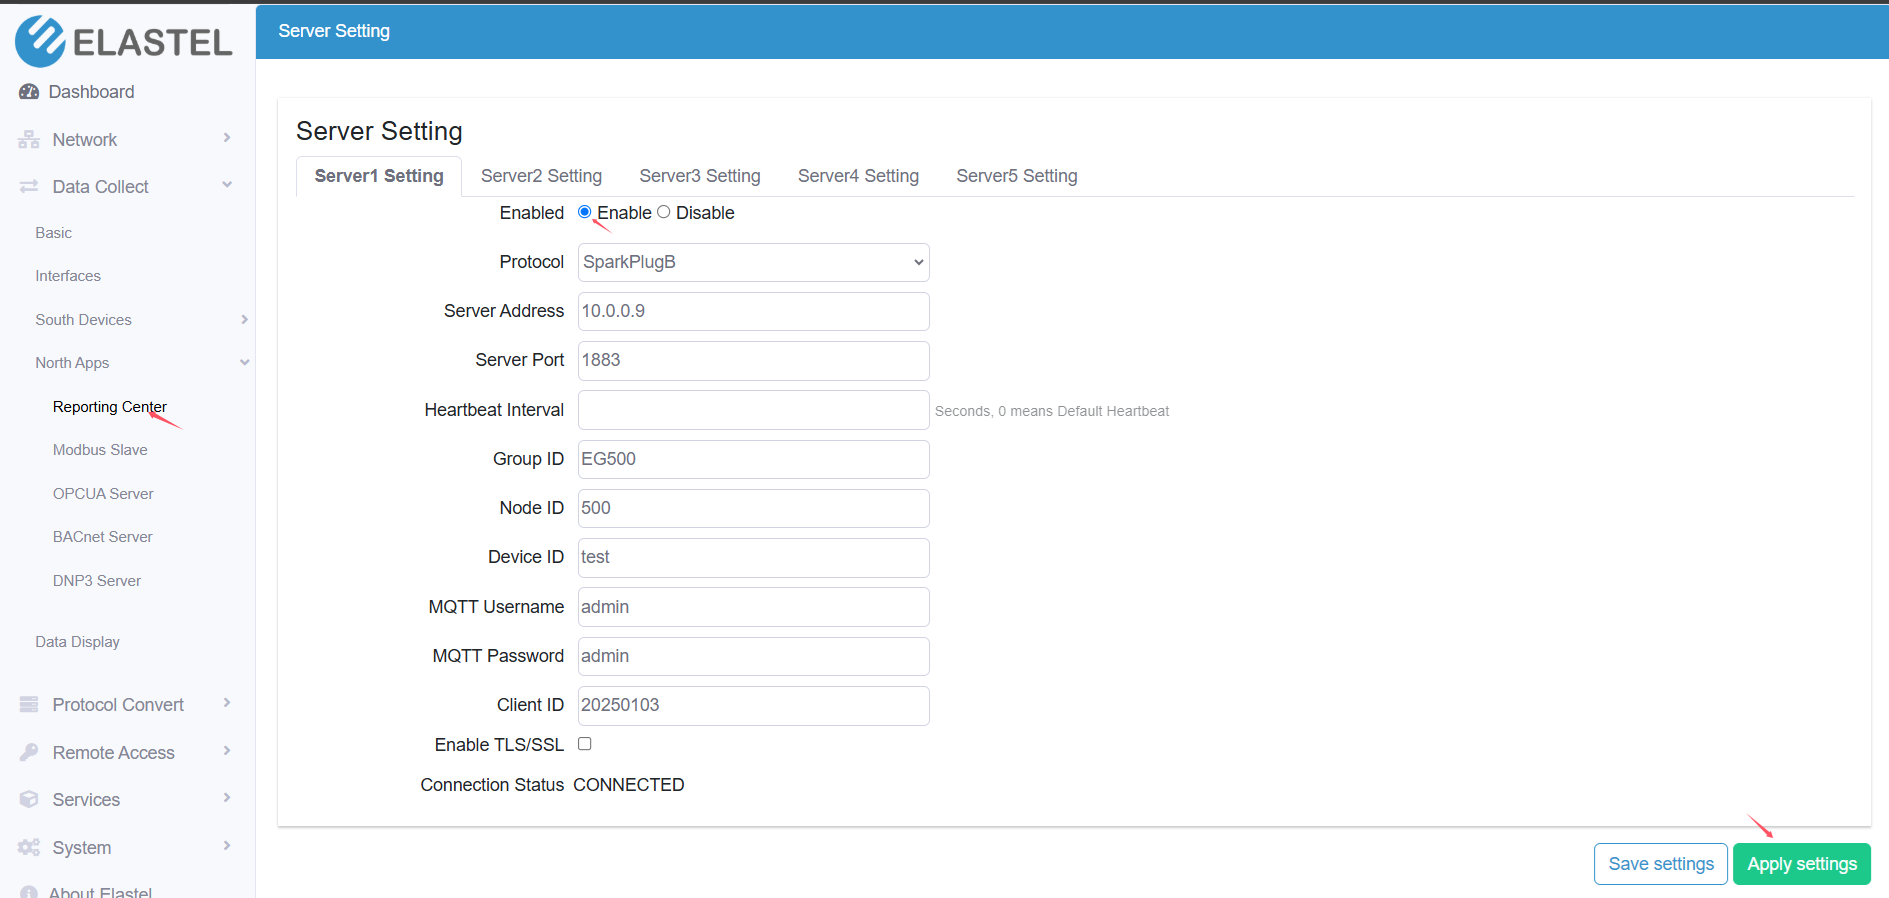
2.4 Connect Gateway to Ignition via Sparkplug B
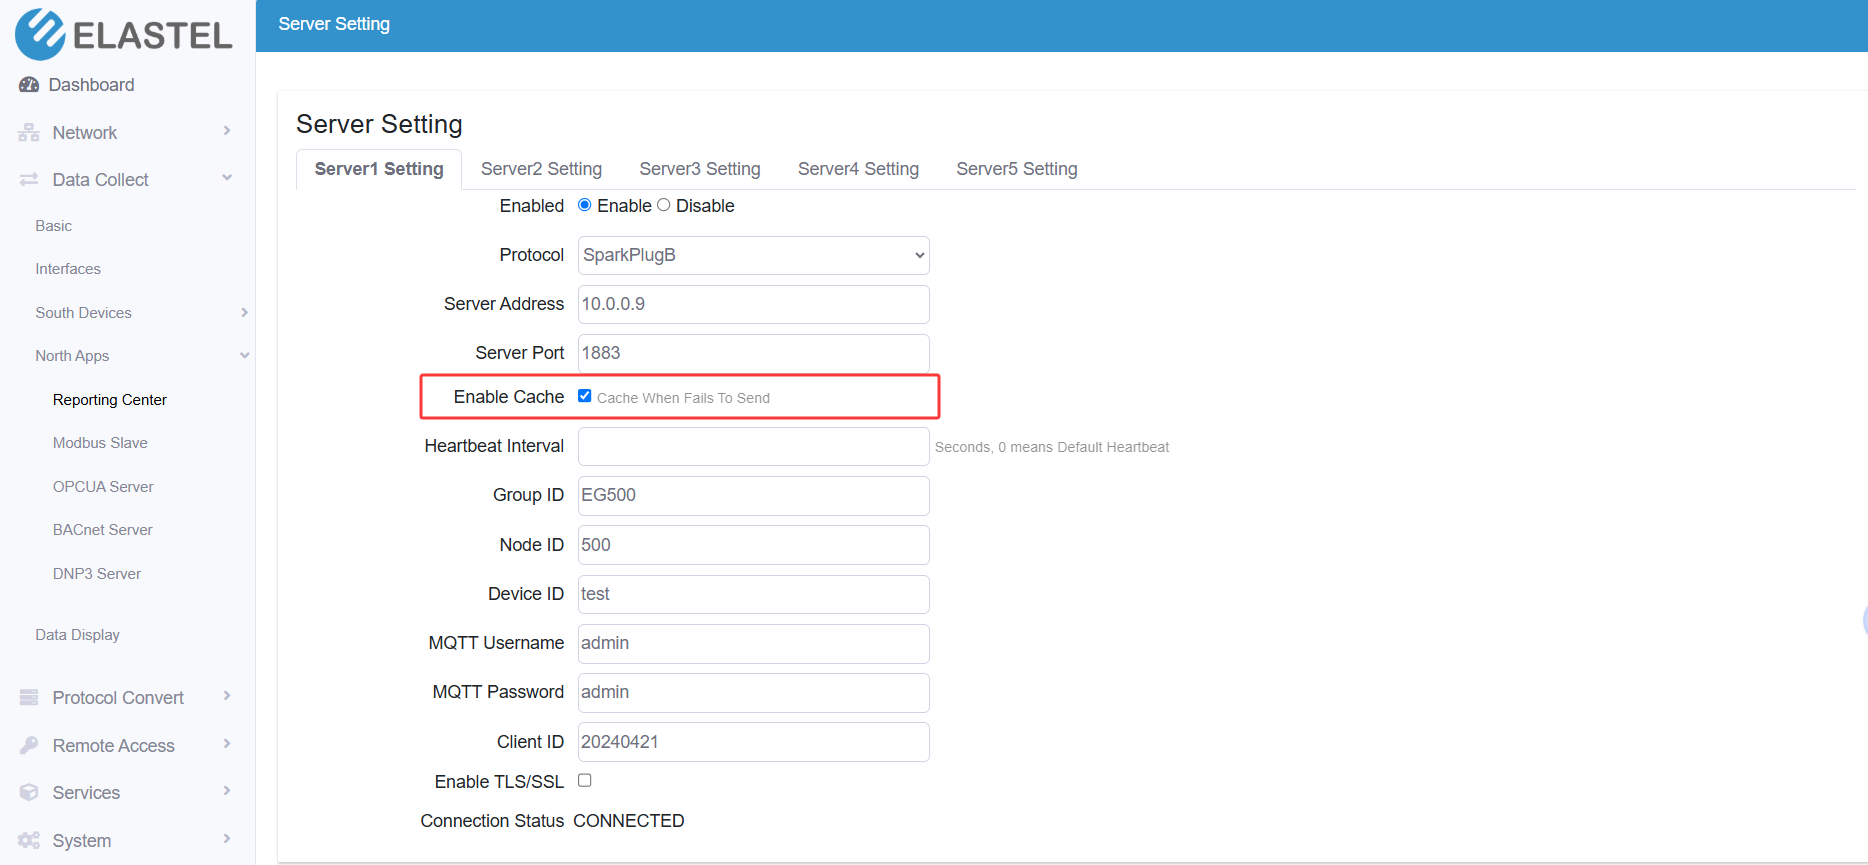
- Navigate to Data Collect → North Apps → Reporting Center.
- Enable Server1 and select SparkplugB protocol.
- Enter broker URL (IP of Ignition Distributor), credentials, and EoN/EoT parameters.Click Apply Settings.
3. Verify Data on Ignition
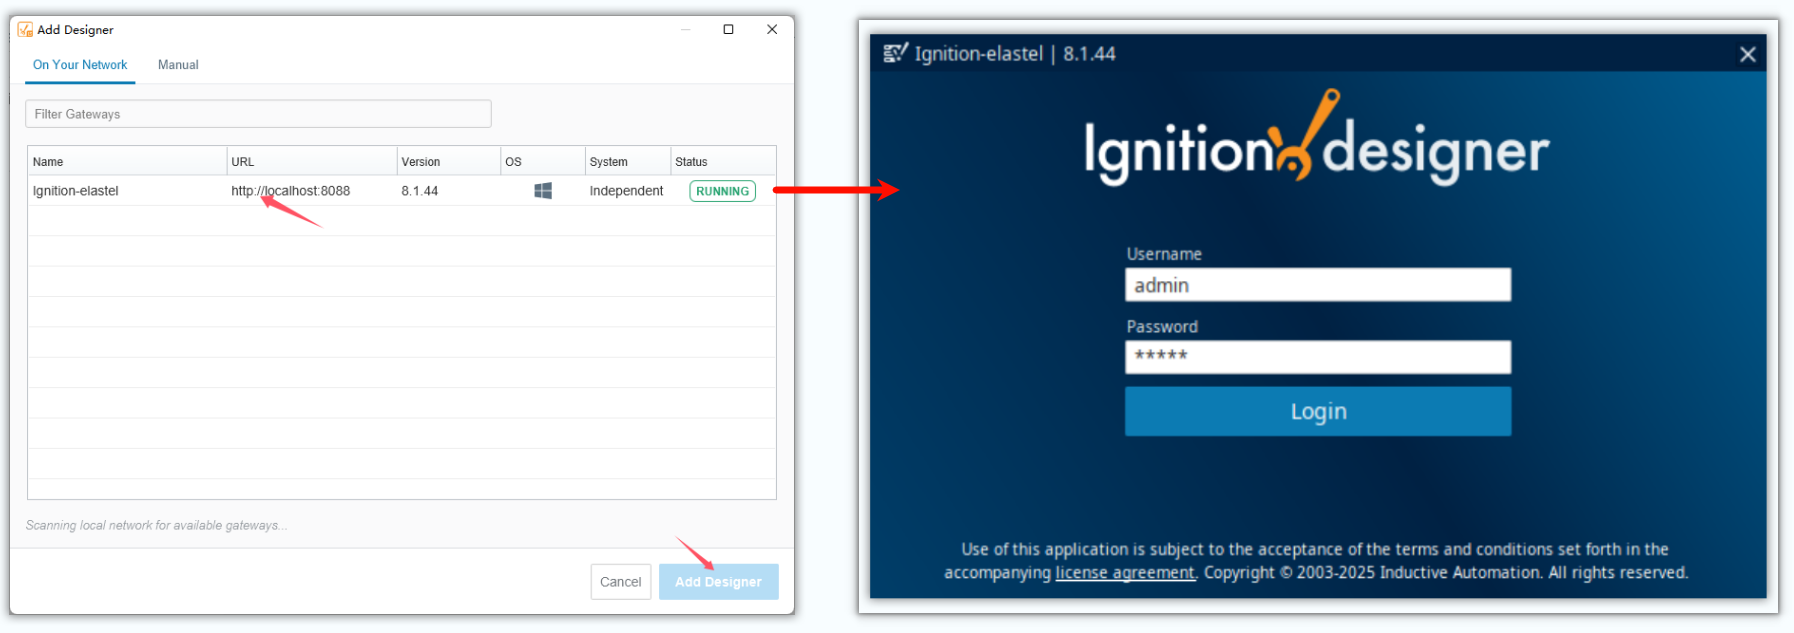
3.1 Launch Designer
- Open Ignition Designer Launcher.
- Click Add Designer and enter the Ignition server URL.
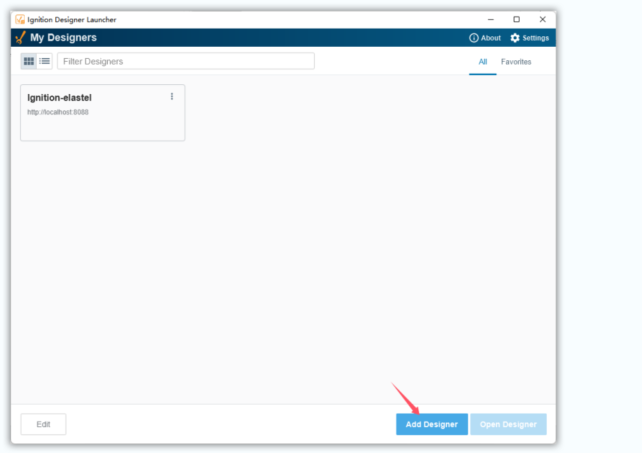
- Double-click the server entry to launch and login the Designer.
3.2 View Tags
- In Designer, open the Tag Browser.
- Expand MQTT Engine → Edge Nodes → EG500 → 500 → test (the group we configured).
- Confirm real-time data points are appearing.
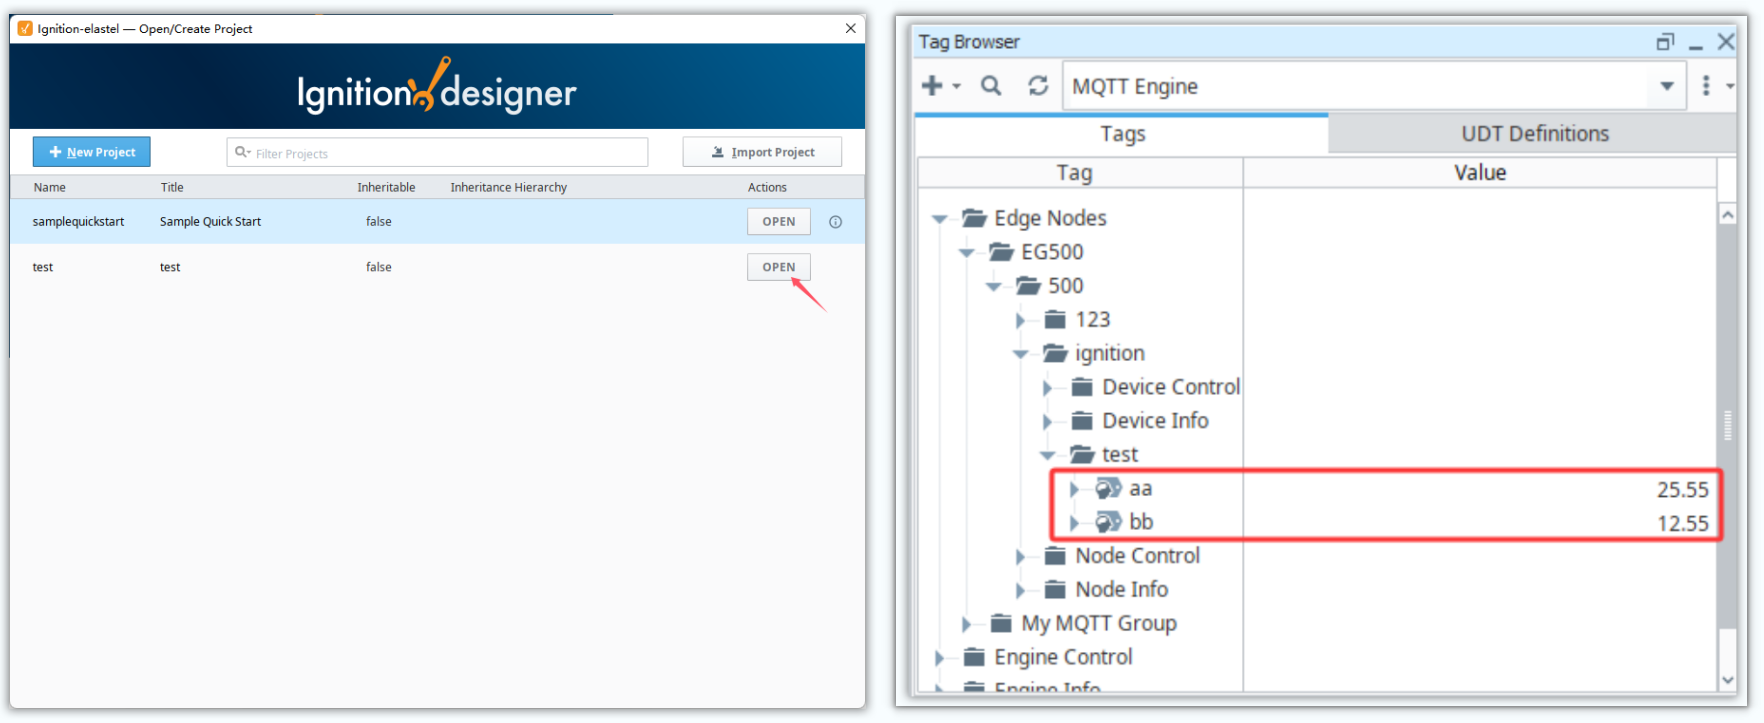 You can cross-check uploaded data on the EG500 WebUI under Modbus Rules to verify correctness.
4. Backfill Function Test
Elastel gateway support backfill feature, it caches data locally when the network is down and forwards it to reporting center when connectivity is restored.
4.1 Enable Cache on Gateway
- In EG500 WebUI, go to Data Collect → Basic and enable Cache.
- Under Data Collect → North Apps → Reporting Center, enable Cache for the Sparkplug B server.
4.2 Configure Ignition for Historical Data
4.2.1 Create/Use Database
- In Ignition Web Interface, go to Config → DATABASES → Connections.
- Use the default
Sample_SQLite_Databaseor create a new connection.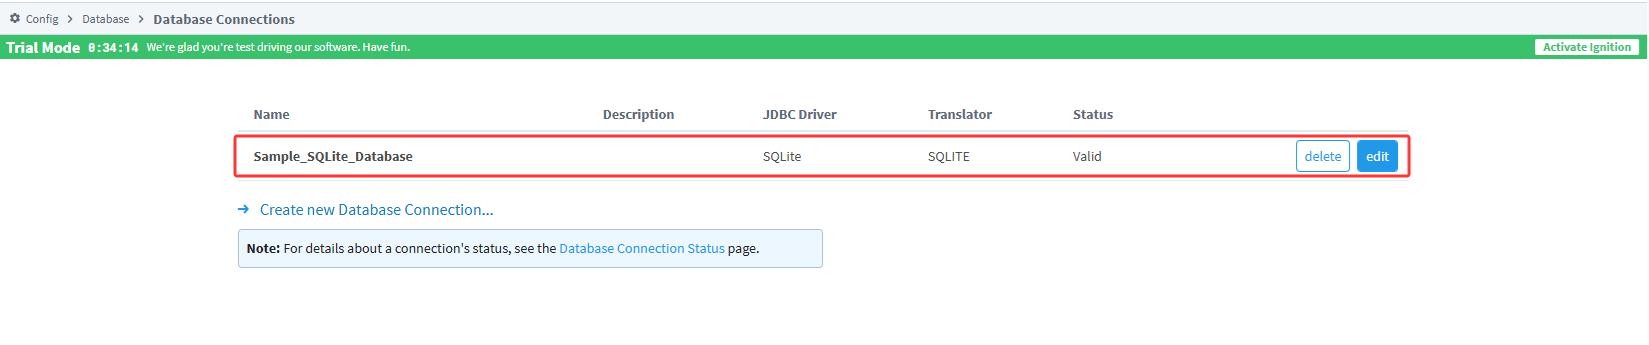
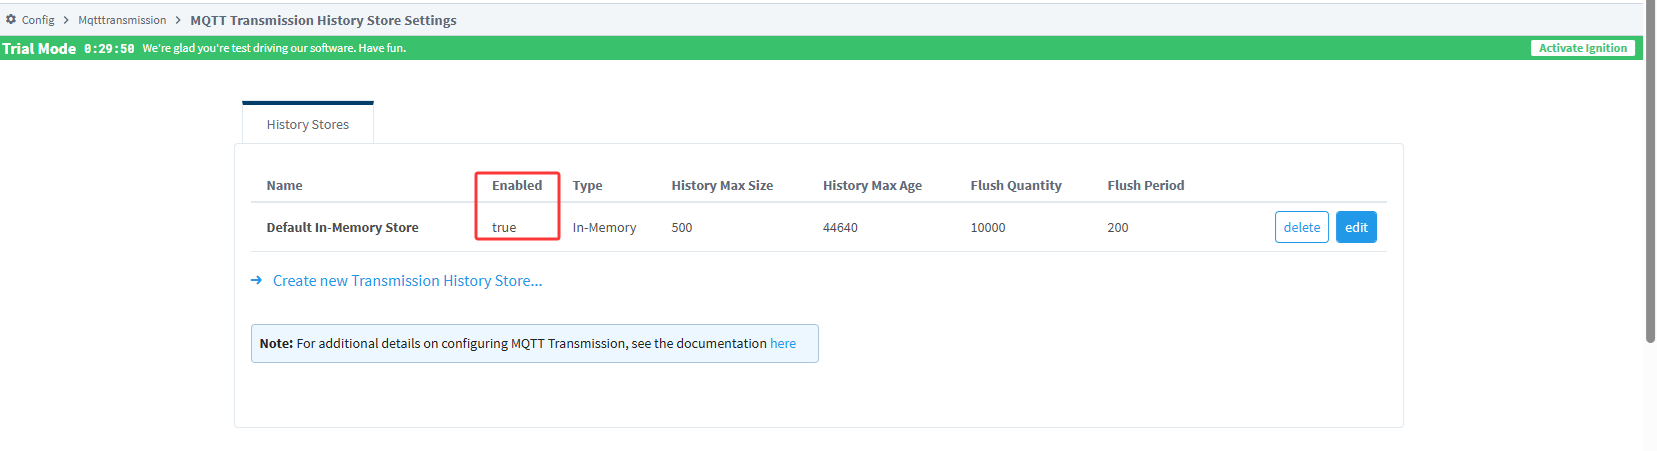
4.2.2 Enable MQTT History
- Navigate to Config → MqttTransmission → MQTT History.
- Ensure History Provider is enabled.
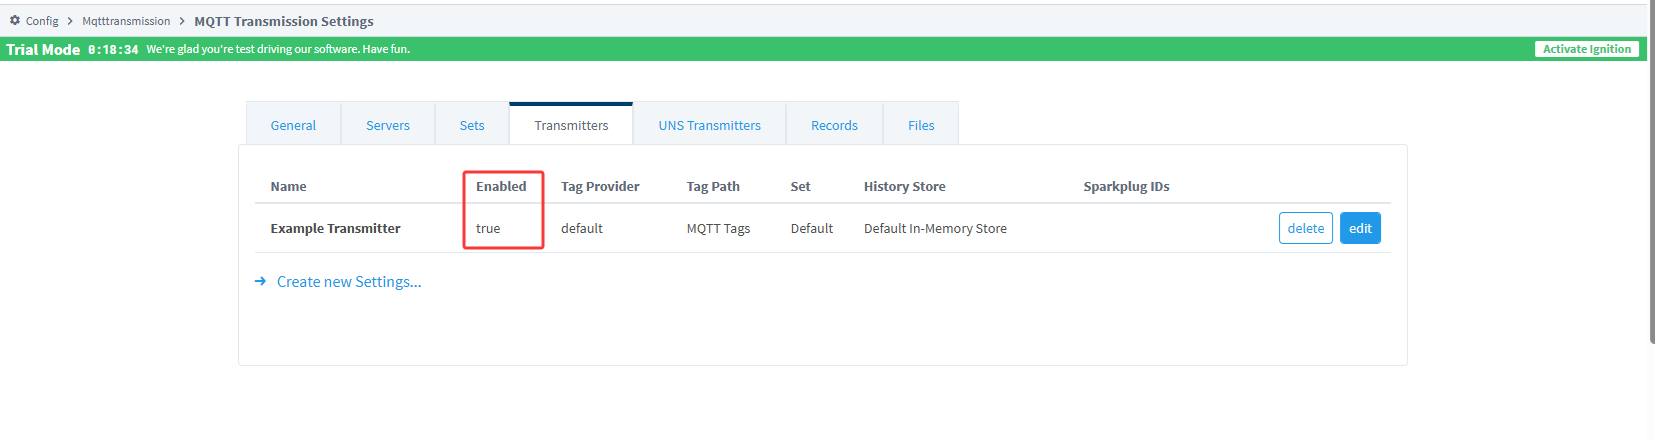
4.2.3 Transmission Settings
- Go to Config → MqttTransmission → MQTT Transmission Settings.
- Confirm settings are enabled to allow backfill data transmission.
4.3 Enable Historical Logging in Designer
- In Ignition Designer, locate your Sparkplug-based tags.
- Double-click each tag, check History Enabled, choose your database as Storage Provider, set Deadband Style to
Discrete, and Max Time Units toSeconds. - Click OK to save.

4.4 Test Backfill
- Disconnect the EG500 network for at least one minute.
- Reconnect the network.
- Verify that the EG500 automatically sends cached data to Ignition.

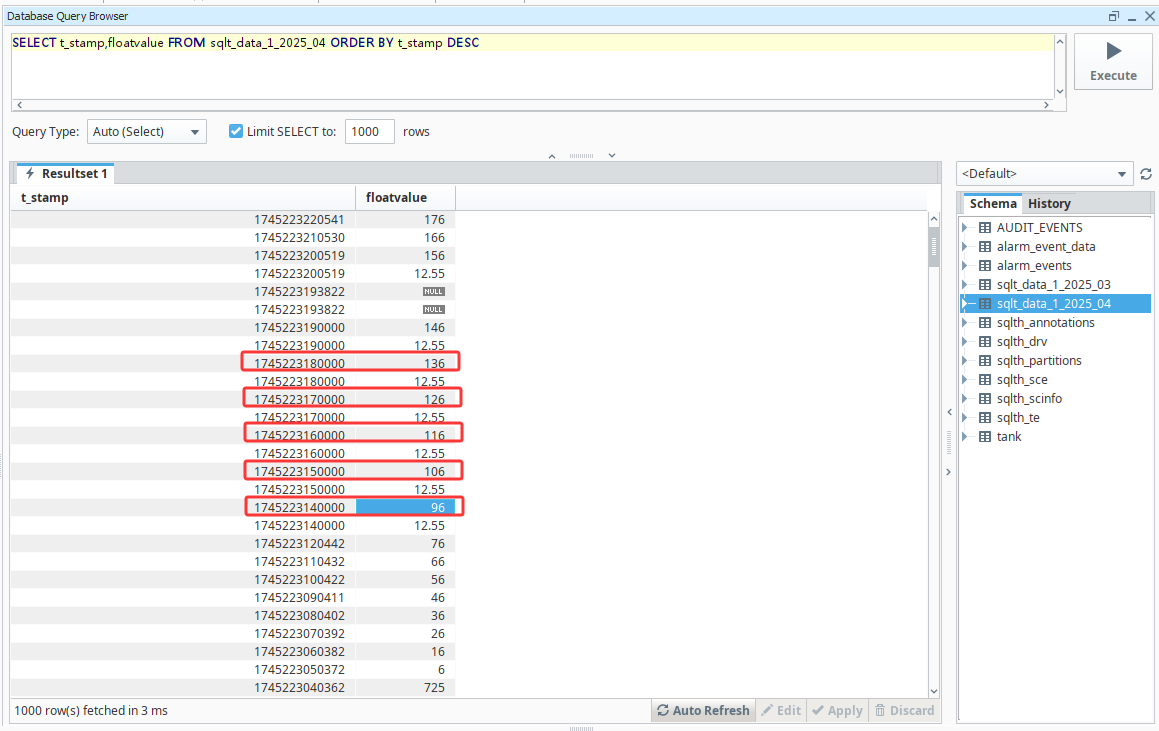
4.5 Monitor Backfilled Data
Use the Ignition Database Query Browser in Designer to query your historical tables. Verify that timestamps align with the offline period (gateway uses Europe/London time).
Conclusion
In this tutorial, we demonstrated how to collect industrial data via Modbus TCP and seamlessly publish both real‑time and historical data to the Ignition platform using the Sparkplug B protocol. With the pre-installed ElastPro IIoT software, integrating your IIoT data into Ignition system is more straightforward than ever.
For more information about Elastel gateway products, feel free to Contact us!